Mould Making and Production of Polycarbonate Sterilization Trays with Silicone Mats
A sterilization tray is made by injection moulding the tray body in a polished steel mould, and the silicone mat is made separately in its own mould and then fitted into the tray. The two parts have different materials, different mould temperatures and different tolerances, so they are tooled and inspected as two products that have to work together. The most important decision comes before any steel is cut: whether polycarbonate is the right resin for the way the tray will be sterilized.
Key facts
Polycarbonate (PC) tolerates ethylene oxide, gamma and electron beam sterilization well. It is not suited to devices that are steam autoclaved repeatedly, because repeated steam degrades its properties. For frequent steam cycles at 134 C, PPSU is the usual choice.
The tray base is perforated so steam, gas and water can pass. That makes the mould more complex than a plain box: many core pins, thin steel sections and weld lines around holes.
The silicone mat holds instruments in place. It is usually moulded in liquid silicone rubber (LSR) or compression moulded, and it needs holes that line up with the tray perforations.
Mould steel, polish and cooling decide cosmetic quality, cycle time and how long the mould lasts.
Regulatory and biocompatibility requirements depend on the market and on how the tray is used, so confirm them with the product owner before tooling starts.
Is polycarbonate the right material for a sterilization tray?
It depends on how the tray is sterilized. Polycarbonate is clear, tough and easy to mould, and it works with several sterilization methods. Its weak point is repeated steam.
Repeated steam autoclaving. PC: limited. Standard grades can distort above about 121 C, and repeated autoclaving degrades properties. PPSU: strong. The supplier Solvay reports over 1,000 steam cycles, and a PPSU tray lid system for 138 C has been described.
Ethylene oxide. PC: good. PPSU: good.
Gamma and e-beam. PC: good, though clear grades yellow. Gamma-stable grades reduce this. PPSU: good.
Appearance. PC: clear or tinted, good for seeing instruments. PPSU: usually amber or opaque.
Material and mould cost. PC: lower. PPSU: higher, and it needs higher mould temperatures.
Best fit. PC: single or low-cycle use, EtO or radiation sterilized, clear display trays. PPSU: hospital trays that go through the autoclave every day.
Two practical points before you commit.
1. Ask which sterilization method the customer actually uses. If the end user runs steam every day, a PC tray may crack or cloud within months, and that becomes your problem, not the resin supplier's. If the trays are for EtO or radiation, or for limited steam cycles with a high-heat PC grade, PC is a sound and cheaper choice.
2. Check detergents and disinfectants. Polycarbonate can craze when stressed and exposed to some chemicals, and lipid emulsions are a known cause. Confirm the hospital cleaning chemistry against the resin supplier's chemical resistance data before you freeze the design.
Sources: Medical Applications of Polycarbonate (MDDI) and PPSU on the medtech map (PlasticsToday). The 1,000 cycle figure is a supplier claim, not an independent test.
How is the tray mould designed?
A tray looks simple, but a perforated, deep, polished part with snap or clamp features is harder to mould than it appears. These are the decisions that matter most. Ranges are typical starting points, and the final values come from the part drawing and the resin datasheet.
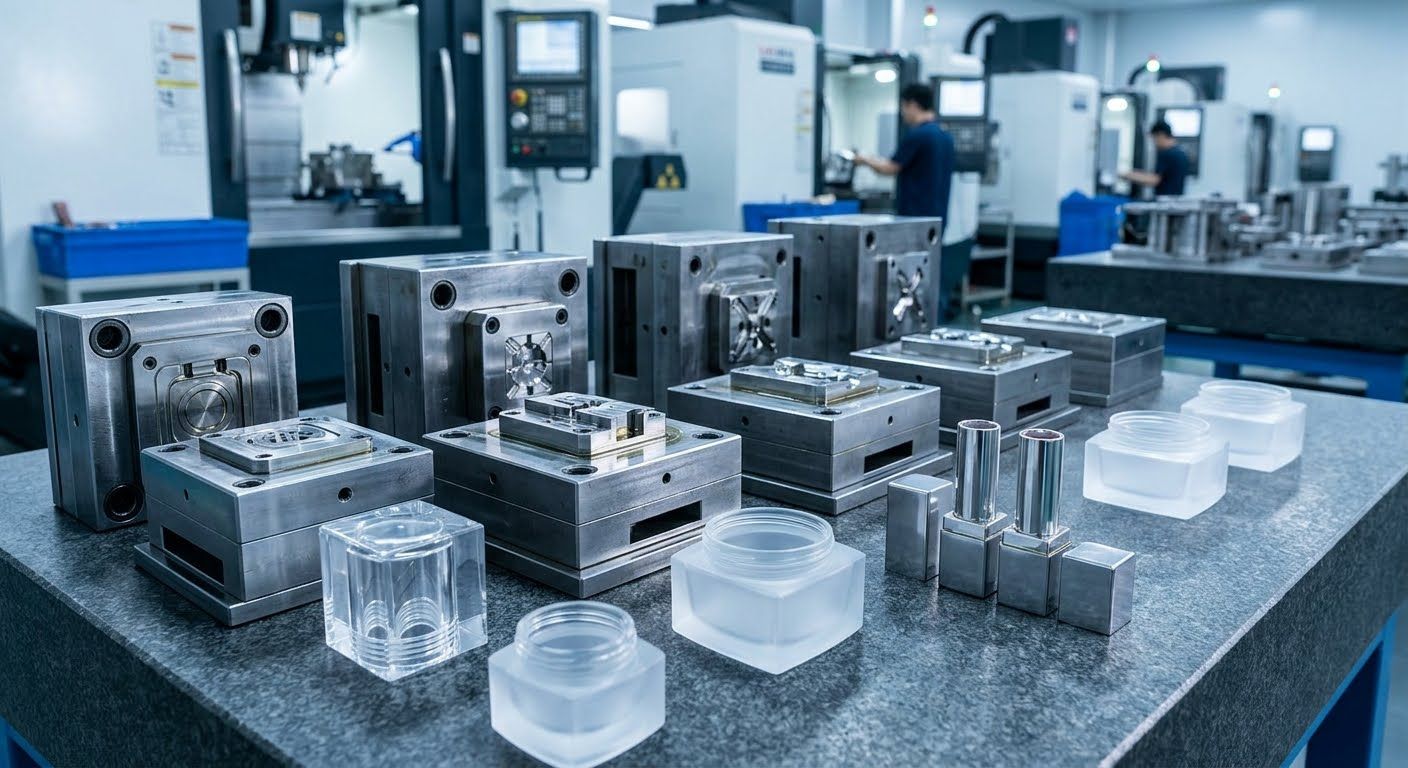
Mould steel. Use a hardened stainless steel such as S136 (420 type) at about 48 to 52 HRC for polished cavities. Pre-hardened steel is cheaper but wears sooner. Why it matters: polished clear PC shows every mark, and corrosion resistance protects the polish, especially if the mould sits idle.
Perforations. Use core pins or blades for every hole, with draft of about 1 to 2 degrees where the design allows. Why it matters: steam and drainage need the holes, thin steel between holes can crack, and each pin is a maintenance point.
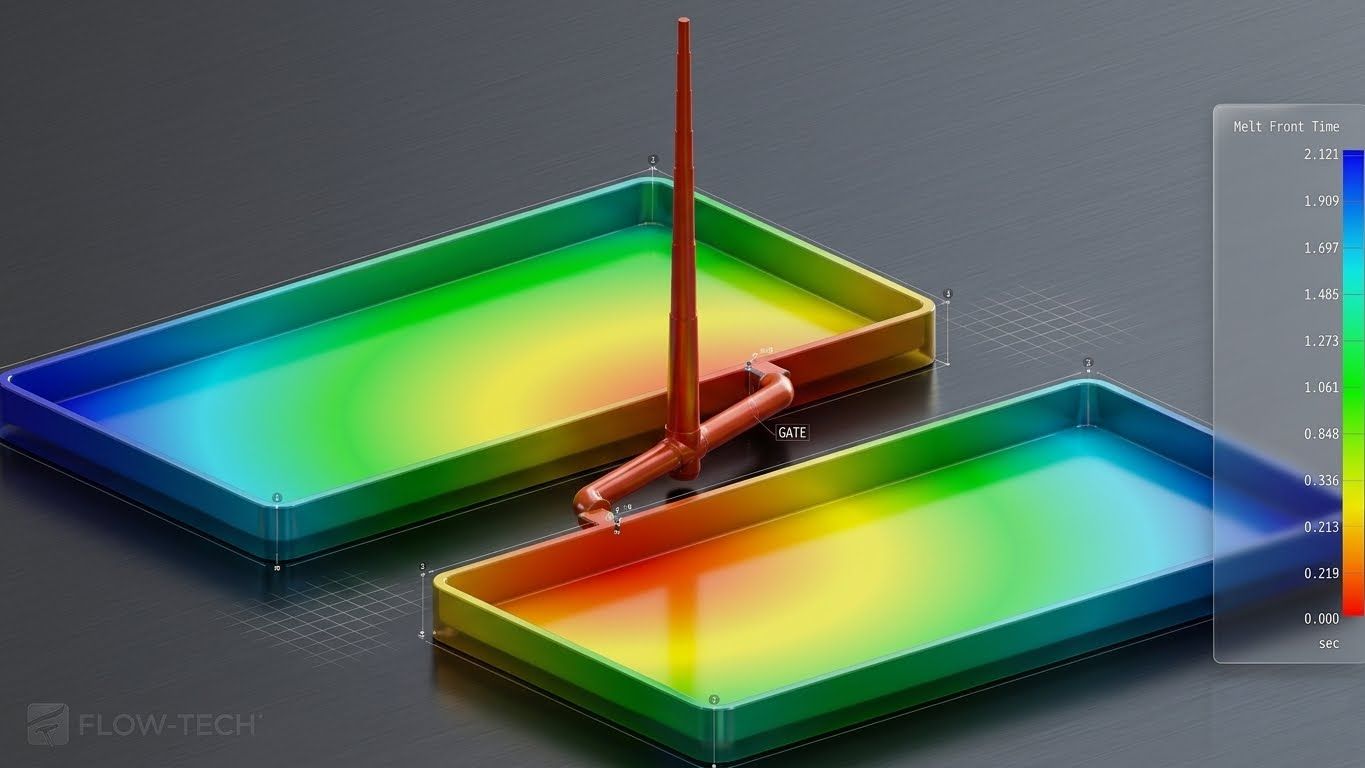
Gating. Usually a hot runner with valve gates: one gate for small trays, several for long ones, placed to control where flow fronts meet. Why it matters: weld lines near holes are weak and visible, and PC is notch sensitive.
Wall thickness. Keep walls even, often around 2 to 3 mm, with ribs thinner than the wall they stand on. Why it matters: uneven walls cause sink marks, warpage and uneven cooling.
Corners and edges. Use generous radii instead of sharp inside corners. Why it matters: sharp corners concentrate stress, which is how PC cracks in use.
Cooling. Balanced channels around the cavity, with bubblers or baffles in deep cores. Why it matters: hot spots cause warpage, and the trays must sit flat to stack.
Ejection. Stripper plate or sleeves, with ejector pins placed on non-visible or rib areas. Why it matters: ejector marks on a clear surface are a rejection reason.
Venting. Fine vents at the end of fill and around deep pockets. Why it matters: trapped air burns PC and leaves brown marks.
Marking. A flat zone for laser marking, or an insert for part number, date and cavity code. Why it matters: traceability is expected on medical parts.
A note on size. Large instrument trays can need a big press and a heavy mould. Check the clamp tonnage, the press platen size and the shot volume early, because these decide which partner factories can run the job.
How is the silicone mat made and fitted?
The mat does three jobs: it holds instruments in position, it protects them from knocking against each other, and it lets steam and water through. In most designs it is a separate part that sits in the tray, not something moulded onto it.
Why it is usually a separate part. Polycarbonate is moulded with a mould temperature of roughly 80 to 120 C, while liquid silicone rubber (LSR) cures in a hot mould, often around 170 to 200 C. Combining them in one mould or one shot is possible in some designs, but it adds cost and risk. Two separate tools are simpler and easier to replace if the mat wears out.
Moulding options
LSR injection moulding. Good for repeatable production, fine details and small to medium mats. Watch out: it needs a cold runner or cold deck so the silicone does not cure in the feed system, and tool cost is higher.
Compression moulding. Good for larger, flatter mats, with lower tooling cost and shorter lead time. Watch out: flash needs trimming and the cycle is slower.
Cut from sheet. Good for very low volume. Watch out: no raised pegs or custom fingers, and edges are less clean.
What to specify on the drawing
Silicone type and hardness. Platinum-cured medical grade silicone is common, and typical hardness for instrument mats runs from soft to medium (around 40 to 70 Shore A). Confirm with the resin or silicone supplier.
Hole pattern that matches the tray perforations so steam is not blocked.
Peg or finger height and spacing, matched to the instruments the tray holds.
Edge fit. A mat that is too loose slides, and one that is too tight lifts and buckles when it heats.
Colour. A contrasting colour helps staff see missing instruments at a glance.
Silicone expands noticeably with heat, so test the mat inside the real tray after a steam or EtO cycle, not just on the bench.
How are the trays produced?
Good trays come from a controlled process. These are typical settings for general medical-grade PC. Always follow the datasheet of the grade you buy, because values differ between grades.
Drying. About 120 C for 3 to 4 hours, to very low moisture. Wet PC hydrolyses in the barrel and makes brittle parts with silver streaks.
Melt temperature. Roughly 280 to 320 C. Too low and the part will not fill, too high and the resin yellows or degrades.
Mould temperature. Roughly 80 to 120 C. Gives a better surface and lower moulded-in stress, with a longer cycle.
Injection speed. Moderate and profiled. Fast fill causes jetting and burn marks, slow fill causes weld-line weakness.
Packing and cooling. Enough packing to avoid sinks, then even cooling. Poor cooling bends the tray so it will not sit or stack flat.
Annealing (if needed). Low-temperature stress relief after moulding. It reduces residual stress in parts that will see chemicals or heat.
Common defects and fixes
Silver streaks: the resin was not dried enough. Check the dryer dew point and the drying time.
Weld lines at holes: raise melt and mould temperature slightly, move or add a gate, or change the hole layout.
Burn marks: improve venting and reduce the final injection speed.
Warpage: balance cooling and check wall thickness. A fixture can hold the tray flat while it cools if needed.
Cracking in use or after cleaning: reduce moulded-in stress, add radii, and check the chemicals the hospital uses.
Black specks: purge the barrel properly, use clean regrind control, and keep the hot runner clean.
Cleanliness. Medical parts are normally moulded and packed in a controlled environment. The exact level depends on the customer and the product. Agree it, along with packaging and labelling, before the first production lot.
What standards and tests apply?
The product owner, meaning the company that sells the tray under its own name, is responsible for regulatory compliance in each market. The manufacturing side supports it with materials, process control and records. These are the references that usually come up:
Quality system: ISO 13485. Quality management for medical device organisations.
Biocompatibility: ISO 10993-1. How to evaluate the biological safety of materials that touch the patient or the device.
Steam sterilization: ISO 17665. Requirements for moist heat sterilization processes.
Ethylene oxide: ISO 11135. Requirements for EtO sterilization processes.
Radiation: ISO 11137. Requirements for radiation sterilization.
Rigid containers: AAMI ST77. Containers for reusable medical device sterilization.
Which of these apply depends on the market, the product claim and the tray's classification, so check with the regulatory lead before tooling is finalised.
Tests worth building into the first samples
Dimensional report on the tray and the mat, including flatness and the fit of the mat in the tray.
Material certificate and lot number for the resin and the silicone, kept with each production lot.
Visual inspection against an agreed standard for scratches, streaks and flash.
Sample trays run through the customer's real sterilization cycle several times, then checked for cracking, cloudiness, warpage and mat fit.
Drop and stack test where the tray will be handled by staff.
Keep every report from the first article stage. If a customer audit or a complaint comes later, those records are what protect everyone.
What should you ask before buying a tray mould from China?
Which resin grade, and is it medical grade with a datasheet and lot certificate?
How will the tray be sterilized, how often, and with which cleaning chemicals? The material depends on this.
How many cavities, how big a press, and what is the cycle time estimate?
Which steel and which hot runner brand are used, and are spare parts included?
Who makes the silicone mat, in what hardness, and is it tested in the finished tray?
What first article reports, mould trial videos and sample parts come before shipment?
How are lots traced, and how is the moulding area kept clean?
Who owns the mould drawings and the tool after payment?
Frequently asked questions
Can polycarbonate be autoclaved? Only to a limited extent. Standard polycarbonate can distort above about 121 C, and repeated steam autoclaving degrades its properties. For trays that go through steam every day, PPSU is the usual choice. Polycarbonate suits EtO, gamma and electron beam sterilization well.
Why are sterilization trays perforated? The holes let steam, gas and water reach every instrument and drain out afterwards. The perforation layout also decides how complex the mould is.
Is the silicone mat moulded onto the tray? Usually not. It is a separate part, moulded in its own tool from LSR or by compression, and then fitted into the tray. The two materials need very different mould temperatures.
Which mould steel is best for a clear polycarbonate tray? A hardened stainless steel such as S136 is a common choice because it takes a high polish and resists corrosion. Your mould maker will confirm the grade and hardness for your volume.
How long does it take to make a tray mould? It depends on size and complexity. Perforated trays with hot runners take longer than simple parts. Ask the supplier for a written schedule that separates design, steel, machining, polishing, trial and revision.
Do I need a hot runner? For most large trays, yes. A hot runner gives a cleaner gate and removes runner waste. For a small volume or a trial batch, a cold runner can save tooling cost.
Need a tray mould quoted?
HongYing Tooling manages mould making and production through a network of verified manufacturing partners in China, and we act as one engineering contact for the whole project. Send us the tray drawing, the resin you intend to use, how the trays will be sterilized, and your yearly volume. We will review it for moulding problems before any steel is cut and give you a quote with a clear schedule. You can start on our injection mould page or email jayson@hongyingtooling.com.